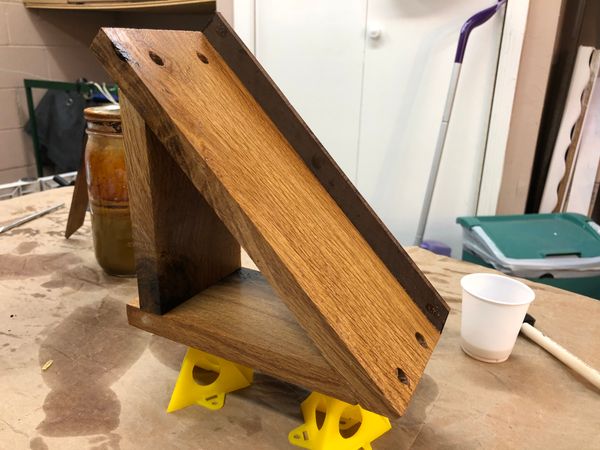
iTED released in Apple app store

Finally! It only took 6 days, but Steve & co. approved iTED for the Apple app store. Either I did well, or the process isn’t as nightmarish as everyone makes it out to be. If anyone is interested, you can download it here.

Posted in Geek Stuff | Tagged , , , , , , , , | Leave a comment

Announcing: Munkee’s Git Admin

I finally broke down and built a simple git admin web interface. I didn’t want to have to keep paying for more private GitHub repositories when I could (almost) just as easily host my own. I didn’t want to have to manage a bunch of keys and ini config files via the command-line, though. So, several months ago, I wrote a PHP class for dealing with all of that stuff, but it needed a web interface. I sat down yesterday and today and finally built it, and here it is!

From the README introduction:

This is a simple and straightforward web interface for managing a local git server. It allows for GUI editing of gitosis.conf and user keys.

More at http://www.garrettbartley.com/munkees-git-admin/

Posted in Geek Stuff, MunkeeSoft | Tagged , , , , , , , | Leave a comment

Announcing: iTED

Earlier this week, I finally released my iTED application for Android OS devices. The iOS (iPhone, iPad, etc) version is still waiting for review with Apple’s app store. You can see more at www.ited.mobi.

From the iTED web site:

iTED is a mobile application for iOS and Android OS devices such as the iPhone and Droid phone lines for monitoring energy usage in conjunction with The Energy Detective.  It’s designed to be able to monitor your home or business energy usage while on-the-go or just to help figure out about how much that new device you just turned on really uses in energy!  iTED initially started out as a toy project for myself to be able to monitor my energy usage on-the-go to fill in gaps left by similar apps for the same platform.  Though it is released as a $0.99 app, the money is not intended to make me rich.  I just want to offset the cost for the developer licenses required to bring this app to the rest of the world.  I hope users of this app find it as useful as I do!

Posted in Geek Stuff | Tagged , , , , , , , , | Leave a comment

Announcing: TED_PHP

Another set of PHP scripts written for myself that others may be able to take advantage of.

From the README introduction:

This is a PHP class to hopefully make writing PHP applications to consume “The Energy Detective” (TED) API a little easier.

More at http://www.garrettbartley.com/ted_php.

Posted in Geek Stuff, MunkeeSoft | Leave a comment

Smoothie Recipe

I have received a few requests over the past couple of weeks for the smoothie recipe that I use. To give credit where credit is due, I got the recipe from my coworker, Mike. Here’s how I (we) do it. The only tools required are a drinking glass (preferably a large “sports cup” size like you get at sporting events or extra large drinks at fast food restaurants) and a decent blender.

Ingredients

  • One yellow banana (not green).
  • Mixed frozen fruit (a single bag of mixed, not a bunch of bags of individual fruit–that’s just too expensive!).
  • Orange juice (pulp or no pulp really doesn’t matter)
  • Another 100% fruit drink. Preferably something a little sour like grapefruit juice or tart like cranberries. My favorite so far is cranberry and grape juice.
  • (Optional) Milk (whatever you like).
  • (Optional) Another bag of individual frozen fruit. I like to either get mixed berries or cherries.

Directions

  1. Peel and dump the banana into the blender.
  2. Now, fill your glass about 3/4 full with frozen fruit. If you have the optional extra fruit, mix a little bit of that in there as well. I find that my favorite mixed-to-specific fruit ratio to be about 3/4 mixed to 1/4 specific. That means the fruit volume is 3/4 & 1/4, glass volume still stays at 3/4!
  3. Add the fruit to the blender.
  4. Fill your drinking glass with the various liquids to the same volume as the fruit (3/4). The recommended mixture if you got milk and another juice is 1/2 orange juice to 1/4 milk and 1/4 juice. If you left out the milk, do 3/4 orange juice and 1/4 other juice. Once again, make sure the total volume of liquids is 3/4 of the glass!
  5. Add the juice to the blender.
  6. Blend. I usually start out on the lower settings and work my way up so I don’t upset the blender too much.
  7. Once fully blended, pour back into the glass, clean up your mess, and enjoy!

It may not be to your liking at first, but it’s easy to experiment around to taste. Sometimes too much milk can make the smoothie a little too creamy. You can also substitute an avocado for a banana. It will make the smoothie a little less sweet, but don’t add any extra sugar because you probably still will not need it. Mike also likes to throw in some vegetables like spinach and carrots. I personally don’t care for what they do to the texture. The taste is fine, but the texture seems to come out a little chalky.

Enjoy!

Posted in General | 4 Comments

Announcing: Tarsnap Monitor

It’s really nothing too special other than it’s handy (for me at least), and my first public project on GitHub. However, if you use Tarsnap and love to use stats and/or are excruciatingly paranoid about running out of money on your balance, you may find it useful. More details at my Tarsnap Monitor page and on the GitHub project page.

Posted in Geek Stuff, MunkeeSoft | Tagged , , , , | Leave a comment

Solar Liquor

Last year, LifeHacker put up an article on how to cut glass bottles with a bottle cutter I bought on eBay. I have also made a few “DIY Mood-Lighting Wine Bottles” as well. Amy then had an idea to combine the all those ideas into a solar mood-lighting bottle that could sit on a window sill to charge throughout the day and glow at night. After a recent party, I got my hands on a small Hennessy bottle to give it a shot. Here’s what I did.

** USE COMMON SENSE AND ANY REASONABLE SAFETY PRECAUTIONS (GLOVES, GOGGLES, ETC) BEFORE ATTEMPTING THIS. I AM NOT RESPONSIBLE IF YOU HURT YOURSELF. THE ONLY PERSON RESPONSIBLE FOR YOU IS YOU. **

Table of Contents


The Tools

You’ll need:

  • Solar path light (from Lowe’s)
  • Thin flat-head screwdriver
  • Pliers
  • Utility knife
  • Small Philips screwdriver
  • Tin snips (or a couple of pliers with cutters)
  • A safe surface that you don’t mind scratching (like a cutting board!)
  • Scissors (not pictured)
  • Small piece of paper (not pictured)
  • Scotch tape or masking tape (not pictured)
  • Pen or pencil (not pictured)


Step 0 – Find the path light and bottle

I can’t help you much here. I can tell you that I found the path lights at Lowe’s in the outdoor lighting aisle on a display in the aisle and not actually on the shelf. They’re very similar to the ones used in the sun jars except that this year’s model has a smaller solar panel and seemingly better battery life. Also, you are on your own for the bottle. I’m no expert on bottle cutting, but you can check the links in the opening paragraph to do it yourself or acquire one by other means. For the record, it’s not easy cutting a liquor bottle. They are usually not perfectly round and have seams in the glass that makes the glass crack all over. Fortunately I was able to use the bottle despite all the extra cracks in it. There are also some bottles that have a wide enough neck to allow you to drop the battery and board into the bottle. You’ll then probably want to drill a hole in the glass and run wires through so that you can leave the solar panel outside the bottle (maybe glued onto the back). This may also improve solar reception.


Step 1 – Initial disassembly

Remove the light assembly from the the stake and remove the battery.


Step 2 – Remove some screws

Remove the screws from the bottom around the battery housing.


Step 3 – Remove the solar panel

Use the flat-head screwdriver to gently pry the solar panel from the top of the assembly. You’ll have to be somewhat forceful at first to get under the panel. Once you get a decent edge up, slowly work your way around the panel. Take careful steps to make sure you don’t slip and stab yourself with the screwdriver (I did it once, it hurts).


Step 4 – Remove some more screws

There are 3 small screws under the black adhesive that will need to be removed. They can be wholly or partially concealed under the adhesive, so you may need to scrape around to find them. You don’t have to scrape the adhesive off to remove the screws. Once you find them, just start unscrewing!


Step 5 – Cutting away the housing

Use the tin snips or a couple sets of pliers to cut, rip, rend, bend, and shred away the housing to free the electronics. This is made much easier with the tin snips, but I’ve also done it with two sets of pliers to cut and then bend and rip the housing away. Not easy, but not terribly difficult. If you use the plier method, take special care that you don’t accidentally cut yourself on any sharp edges! Also, don’t cut any of the plastic that’s part of the battery housing … yet.
Here’s what should be left after all that cutting.


Step 6 – Trim the battery housing

You can pay a visit to your local Radio Shack or similar electronics store and buy your own battery housing, or you can trim what was provided. It’s easiest to use tin snips to cut away as much of the housing as possible. However, I also used the utility knife on a cutting board to cut at it. Even if you use the tin snips, you’ll probably also need to use the utility knife to trim the edges and reduce the housing to as small as possible.


Step 7 – Clean up

At the end of all this, you should have a small pile of garbage. Throw it away and/or recycle whatever you can. You can put away all those tools now.


Step 8 – (Optional) Extra hacking

The boards have holes for additional LEDs. They do require some simple soldering, but feel free to add whatever you like.
It may require a little electronics know-how (knowledge of voltage and resistance) to find the right combination of LEDs to achieve any special effects and colors that you would like, but it is safe and fairly straightforward to add more white or some other color LEDs. The extra blue LED in the picture isn’t soldered in place but just sort of clipped on to show you that there are other color options!


Step 9 – Test installation

Now try putting the assembly into your bottle. I found it easier to manage by using twist ties to hold the battery housing and the board together. Try not to block the LED(s) with the solar panel. Make a mental note of the ideal placement.


Step 10 – Frosting

First, trace an outline of the solar panel onto the small piece of paper and cut out the circle. Add tape to the piece of paper and do your best to tape it in place of where the solar panel was in your test installation. This will help prevent part of the glass from being frosted and affecting your solar reception. Once the paper is in place, frost to taste. I found that frosting once, letting it dry, and then frosting a second time really helped cover everything well. I used a small fan to help speed up the drying process so you can finish it off a little faster. I think I spent maybe 20 minutes from initial frosting to final installation, so it really doesn’t take long to do.


Step 11 – Enjoy!

Once the frosting is dry, remove the paper and install the pieces again as you did in step 9. You should be ready to go! Ideal placement is on a window sill that gets a lot of sunlight. Unfortunately for me, the window sill that I wanted to keep this on doesn’t get much direct sunlight, so it only holds a weak charge and not for very long. By the time the sun has set, the battery is already drained.


Image Gallery

Posted in General | Tagged , , , , | 1 Comment

Free Energy Conservation Kit from TVA

It took a month or two for it to come in the mail, but we finally received our free energy conservation kit from TVA. All I did was do an online energy audit. It’s tough to beat free (as in beer) unless you really count the 15 minutes spent as money. It’s like a sampler kit of some energy efficient goodies. From the thank you card:

We appreciate your time and effort to complete the energy right® do-it-yourself home energy audit. To help you get started, please find an energy efficiency kit with tools to help build on the information included in your personalized audit report. Using all the contents of the energy efficiency kit could help provide a savings ranging from $2 to $4 on monthly power bills, depending on individual energy use. Following all of the recommendations from the personalized energy audit report could save as much as 20 percent on annual utility bills.

In this kit you will find a comprehensive “How to Save” brochure, two compact fluorescent light bulbs which use 75 percent less electricity and last 10 times longer than traditional light bulbs, as well as:

  • Filter Whistle that sounds when the heating or cooling system filter is 80 percent clogged and needs to be changed
  • Outlet and Light Switch Gaskets — insulation to help stop drafts and save energy
  • Faucet Aerators (two) — water-saving filters that improve efficiency
  • Hot Water Temperature Card that measures temperature of hot tap water and indicates if thermostat adjustment is needed to save money and prevent water scalds
  • Energy Use Thermometer Gauge that helps check energy costs for heating and cooling; Each degree thermostats are set back eight hours a day can reduce heating bills by as much as 3 percent, and up to 5 percent on cooling bills.

Please feel free to help spread the word with family and friends about the home energy audit to help them start saving energy and money on power bills.

Once again, thank you. If you have any questions or would like more information on how to save energy, contact your local power company or visit www.energyright.com.

So, take a few minutes out of your day (maybe during an afternoon thunderstorm) and do the free online energy audit.

I know. It sounds like an advertisement. It basically is, but it’s free stuff, so you aren’t out any money. It’s also stuff that, in theory, will actually save you money in the long run!

Posted in General | Tagged , , , , , , | Leave a comment

Running Bootcamp using VirtualBox [Updated 2011-08-04 for OS X Lion]

UPDATE (2011-08-04)! If you installed OS X Lion and are having problems with “missing operating system” when you boot your virtual machine, it is because Lion installed a new recovery partition that re-arranged the partition numbering scheme. Replace any references to disk0s3 with disk0s4 and “-partitions 3″ with “-partitions 4″. That should get you up and running.

Just wanted to put all this out there so that hopefully other people can find it. I’ll need this again as a reference for when I set up my wife’s laptop as well!
Please note that anything documented here is how it worked for me on my laptop. If you have issues, look for any notes below. If you can’t find an answer, check Google. As a last-ditch effort, you can comment here, but I don’t know if I will have an answer or not. Oh, and each line in the fancy code blocks below starts with #. That way it will hopefully make it easier to read if something is word-wrapped. I forgot I had a GeSHi plug-in installed. Ignore the strikethrough stuff.

First off, get VirtualBox. As of the time of this post, the current version is 3.2.4. Install it per the instructions. The easy part is done!

Now, open Terminal. You will need to make the Bootcamp partition accessible to VirtualBox. Run the following command:

sudo chmod a+rw /dev/disk0s3

Next, we’ll need to build a VirtualBox vmdk image:

1
2
cd /path/to/wherever/you/want/to/keep/files
sudo VBoxManage internalcommands createrawvmdk -rawdisk /dev/disk0 -filename bootcamp.vmdk -partitions 3

And, finally, make the vmdk file accessible:

sudo chmod a+rw /path/to/bootcamp.vmdk

But, don’t get too excited yet. You’ll lose that whole “chmod a+rw” if you reboot. You can build an AppleScript that will do all that fancy stuff and then launch VirtualBox. Go ahead and start the AppleScript Editor and use the following code (replacing your_password_here with your password–it’s compiled, so I think it’s fairly safe):

1
2
3
do shell script "chmod a+rw /dev/disk0s3" password "your_password_here" with administrator privileges
do shell script "chmod a+rw /path/to/your/vmdks/*.vmdk" password "your_password_here" with administrator privileges
do shell script "open -a VirtualBox"

Save the AppleScript as an application. I named mine “VirtualBootcampBox”. If you want to give it an icon, you can download the applet.icns (icon borrowed from here) and copy it to the Contents/Resources directory of the application you created with AppleScript.

That should do it. Open the application that you created with AppleScript and point your new VirtualBox machine to the vmdk you created and have fun!

Posted in Geek Stuff | Tagged , , | 24 Comments

Monitor Servers Behind a Firewall Using Reverse SSH Tunnels (and Cacti)

Wow. What a subject line! It’s a little technical magic, but fairly easy to do. I won’t cover installing Cacti or the SNMP daemon. There are plenty of guides for those. However, guides for creating and using the reverse SSH tunnel automagically are a little scattered, so I decided to document it for myself. This is all using Ubuntu 10.04 LTS server with Cacti 0.8.7e. I use daemontools to help keep the SSH tunnels up. Any references to “local” means the server that initiates the reverse SSH tunnel (usually behind a firewall). References to “remote” are the server running Cacti that can’t reach the “local” server(s) behind a firewall.

[UPDATE] I figured out how to do it for Windows! I’ve added it down at the bottom. [/UPDATE]

For *nix
On local, generate an SSH key. Do not enter a password. (I haven’t figured out how to make it automagically happen with ssh-agent yet).

sudo -u snmp ssh-keygen -t rsa

Local: copy the contents of /var/lib/snmp/.ssh/id_rsa.pub

sudo cat /var/lib/snmp/.ssh/id_rsa.pub

Remote: add the contents of id_rsa.pub above the authorized_keys

sudo pico -w /var/lib/snmp/.ssh/authorized_keys

Remote: prepend the following to the key you just added in authorized_keys. You may want to change the from option to include your local subnet/domain that your local machines are on. The command option makes sure that you really can’t do anything if someone unauthorized got access to the account.

from="*.epbfi.com",command="/bin/false",no-X11-forwarding,no-pty 

Local: install and start daemontools

1
2
sudo apt-get install daemontools-run
sudo start svscan

Local: create the daemontools service directory

sudo mkdir /etc/service/snmp-ssh-tunnel

Local: create the daemontools run script and set it to executable. Feel free to change the 16101 port and remote.server.tld to reflect your own remote port and server DNS name or IP address. I chose 1610x to reflect the usual SNMP port number plus a couple extra digits. *shrug* It’s all up to you!

1
2
sudo echo -e '#!/bin/sh\n\nsetuidgid snmp ssh -nNT -R 16101:localhost:161 snmp@remote.server.tld' | sudo tee - /etc/service/snmp-ssh-tunnel/run
sudo chmod +x /etc/service/snmp-ssh-tunnel/run

That’s pretty much it for the technical stuff. Now, when you set up a host in Cacti, just use “tcp:localhost” for the Hostname field and put in the port number (in this case 16101) in the SNMP Port field.

It worked for me, so hopefully it will work for anyone else!

For Windows
It’s almost the same as the *nix setup. You’re creating a reverse SSH tunnel just the same. However, we’re just using the help of Net-SNMP to proxy the TCP SNMP from the SSH tunnel to the Windows UDP SNMP agent.

Install the windows SNMP agent (Simple Network Management Protocol). It’s usually under “Add/Remove Programs” and/or “Programs and Features”. Look for something along the lines of Windows Features. It changes for each version of Windows. I’m pretty sure it works for any version of Windows for and after 2000/XP.

Download and install Net-SNMP from http://www.net-snmp.org. You have to install it to the default C:\usr directory. It seems the scripts are hard-coded. The standard agent installation is fine. Follow any other recommended installation instructions. Just don’t do anything beyond that. No need to even try running snmpconf.

Download and install ActiveState’s ActivePerl (the free community edition) for Windows from http://www.activestate.com. Once again, follow any recommended installation instructions.

Download and install BitVise Tunnelier from http://www.bitvise.com/tunnelier. Follow any recommended installation instructions.

Create a C:\usr\etc\snmp\snmpd.conf text file and put the following in it. Just be sure to replace the “XXXXX” with your community name.

rocommunity XXXXX
proxy 127.0.0.1
agentaddress tcp:127.0.0.1:161

Open a command prompt and run “snmpd -register”. This will register snmpd as a Windows service. If you’re running Vista/7/2008, it’ll probably come up with some of application crash error. Just click OK, close, or whatever to make it go away. Go to Windows Services and start the Net-SNMP Agent.

Now we need to get the tunnel set up. Launch Tunnelier. Enter the hostname, port, and username. Leave the Initial method as “none”. Now click on the “User keypair manager” under the authentication section. Click the “Generate New” button. Leave the password blank and the other defaults should be slot 1, ssh-rsa algorithm, 2048 bits, and enter something that will help identify this key in the comments. Click Generate and it will take you back to the keypair manager. Select the key and click Export. Leave “Export Public Key” checked, select “OpenSSH format” and click Export. This will ask you for a location to save the file. Put it anywhere you’re comfortable (your desktop is easiest) with and give it a “.txt” extension. Do the export process again except select “Export private key” and “Bitvise format” and store it somewhere convenient. Now, close the keypair manager and click Login. It will ask you to verify the host key. Click “Accept and Save” and then “Cancel” on the next popup. We just wanted to get the host key. Click on the “Host key manager” link under the server/port fields and export the host key in Bitvise format. Close the host key manager and exit out of Bitvise.

Open the key file that you exported earlier (with the “.txt” extension) and copy and paste that key into the authorized_key files just as you did (or would have done) in the *nix instructions above. You can delete this file now. Create a new directory somewhere on your local computer (I used C:\Tunnelier) and copy the private key and host key files to that directory.

And, finally, you will want to set up a scheduled task to run when your user is logged in to the Windows box. I can’t seem to get this running in any sort of daemon mode even after consulting with Bitvise’s help regarding running it as a service. So, for now, I’ll just stick with the run-on-login method. If you need help setting up some sort of auto-login, go to Start -> Run and then type in “control userpasswords2″. Select the username and enter the password and you’ll be able to auto-login. If this lacks certain security measures for you, you could set up a screensaver to run at 1 minute of idle time and enable password-protection when it exits. Oh, right, the scheduled task. Create a new (basic) scheduled task that will run on login. The path to executable is the full path to Tunnelier.exe. In my case, this is “C:\Program Files (x86)\Bitvise Tunnelier\Tunnelier.exe”. You may have to include the quotes to make sure Windows will recognize the full path. The arguments will be as follows (changing the appropriate paths, hosts, usernames, ports, etc as needed).

-host=remote.host.tld -user=snmp -s2c=127.0.0.1,16102,127.0.0.1,161 -loginOnStartup -reExecOnReconn=y  -noRegistry -keypairFile="C:\Tunnelier\snmp-ssh-tunnel.key" -hostKeyFile="C:\Tunnelier\snmp-ssh-tunnel.hostkey" -proxy=n -openTerm=n -openSFTP=n -openRDP=n -exitOnLogout

Now, start your scheduled task (you have to start it this first time) and check for the remote connection. Do an snmpwalk to test and you should be ready to go.

Posted in Geek Stuff | Tagged | Leave a comment